9 Vintage Halloween Wall Décor Inspirations That Feel Nostalgic
Vintage Halloween wall décor inspirations draw on the early and mid 20th century: die-cut paper, crepe streamers, embossed tin, sepia photographs, and small-scale printed ephemera. A wall zone between 36 and 96 inches wide, with its focal point at 57 to 60 inches from the finished floor, gives each piece enough scale to read as a collection instead of clutter. The nine designs below build nostalgia through patina and restraint, so the wall feels collected over decades rather than bought in a single weekend.
Material authenticity is what separates vintage-inspired from costume-aisle. Matte cotton paper tea-stained to an aged tone, heavy chipboard with brass brads, real crepe paper, embossed 0.3mm tin, and curved-glass oval frames carry the wear, grain, and warmth of the originals, and a palette of cream, tobacco brown, burnt orange, and black keeps it cohesive. The tea-staining method used here is the same one shown in these last-minute Halloween wall decor ideas.
Lighting finishes the nostalgia. Every design specifies a warm color temperature between 2200K and 2700K, because it matches the amber tone of aged paper and photographs and keeps cream walls from turning gray. For a theme-driven alternative built around hats, brooms, and heirloom pumpkins, these witch and pumpkin wall styling ideas pair well with the vintage pieces here.
1. The Antique Postcard Mini-Gallery in Walnut Frames
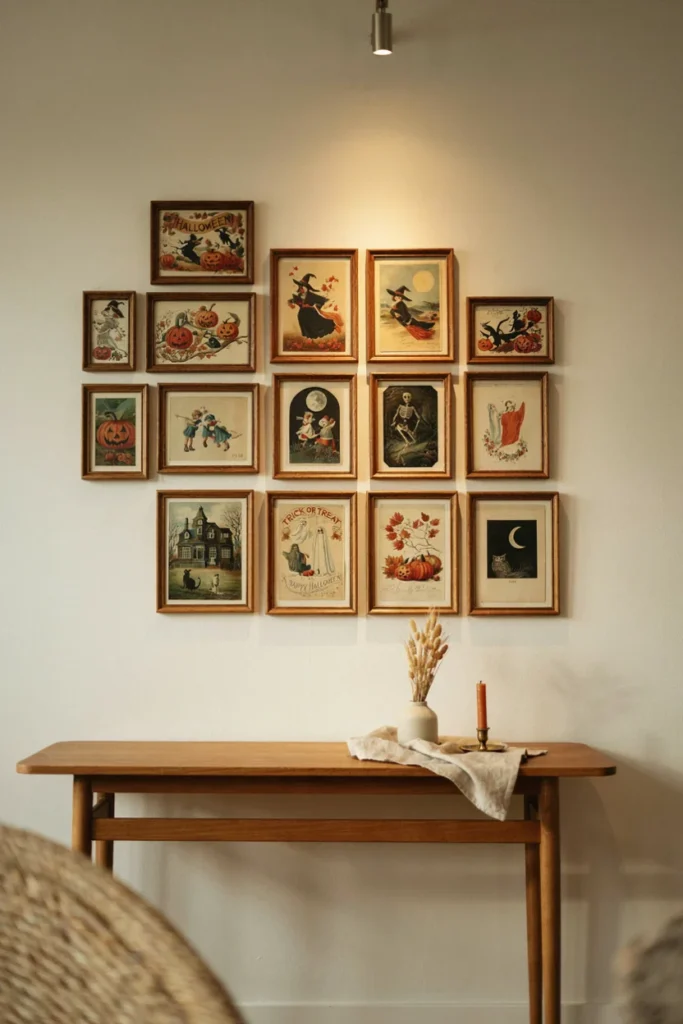
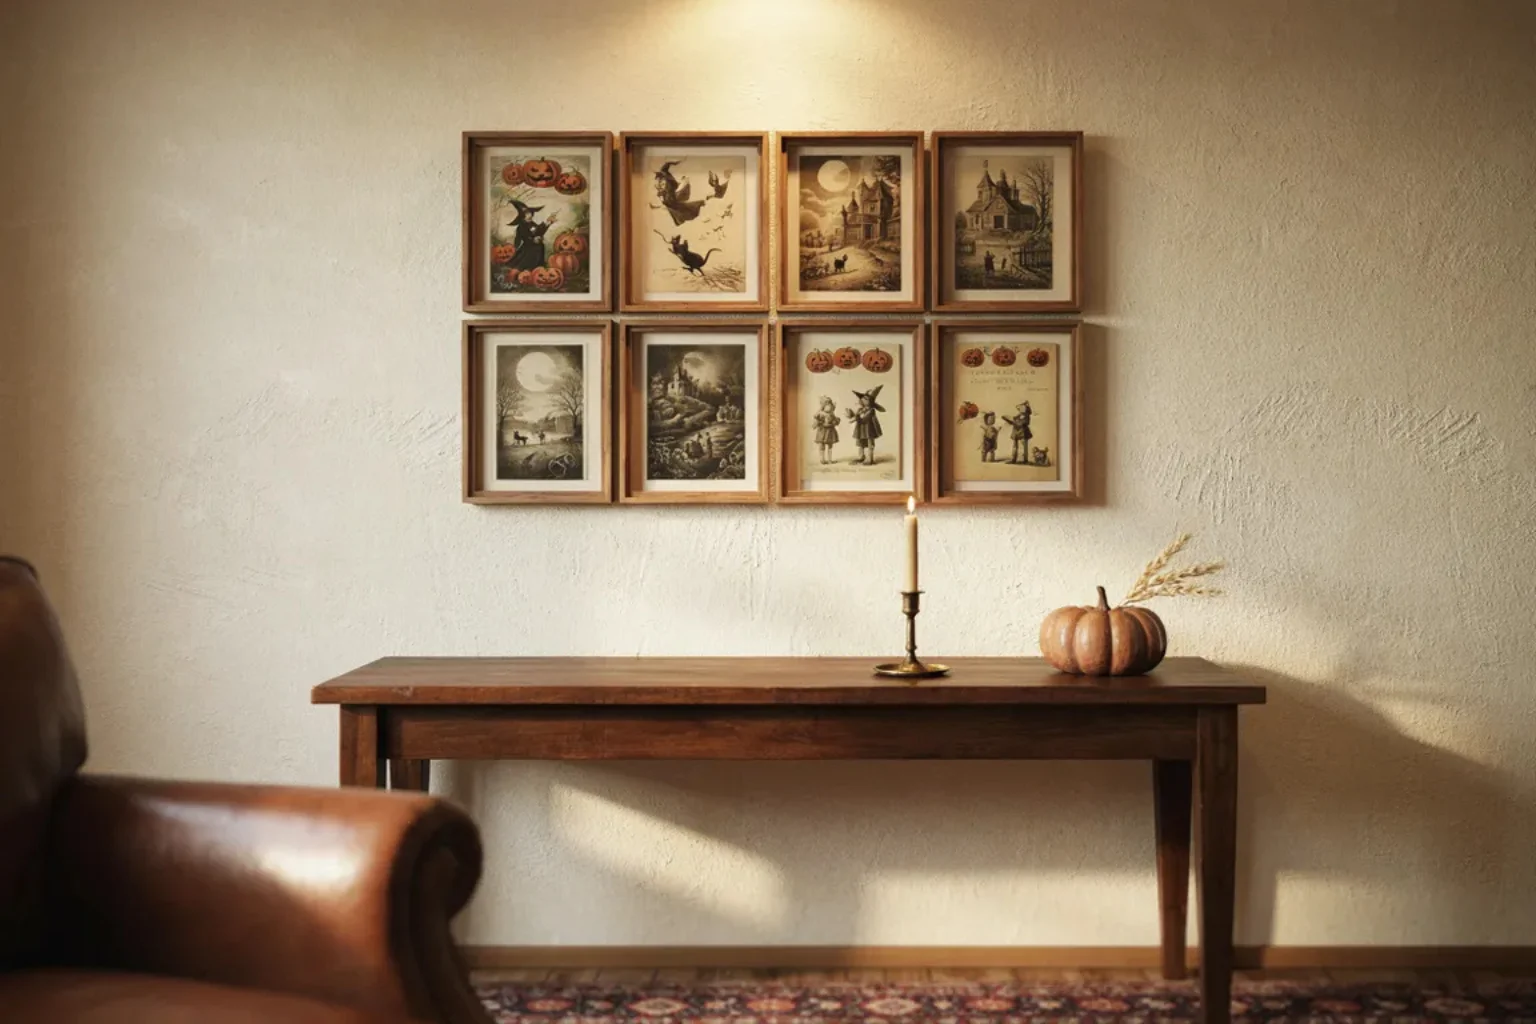
A postcard mini-gallery hangs 12 reproductions of early 1900s Halloween postcards in a tight four-by-three grid of small frames, giving a wall the look of a collector’s display. Source scans from public-domain archives, print them at 300 dpi on 250gsm matte cotton paper cut to 4 by 6 inches, and tea-stain the paper lightly for an aged tone. Mount each in a 5 by 7 inch walnut frame with a 1/2-inch profile and a cream mat with a 3.5 by 5.5 inch opening.
Hang the 12 frames in four columns and three rows with 1.5-inch gaps, producing a grid 24.5 inches wide by 24 inches high, centered at 58 inches from the finished floor, so it spans 46 to 70 inches. Over a 36-inch console, the 24.5-inch width equals about 68 percent of the furniture. Each frame weighs about 1 pound, so one 1-inch picture nail per frame is enough; use paper templates and a laser level to keep the rows true, since a grid shows every misalignment.
Light the grid with a ceiling-mounted track head at 2700K and a 25-degree beam, set 30 inches from the wall. The warm beam makes the tea-stained paper glow like old card stock and keeps glare off the glass, which lets the small illustrations read clearly from 5 feet away.
2. The Jointed Paper Skeleton Hung from a Single Pin
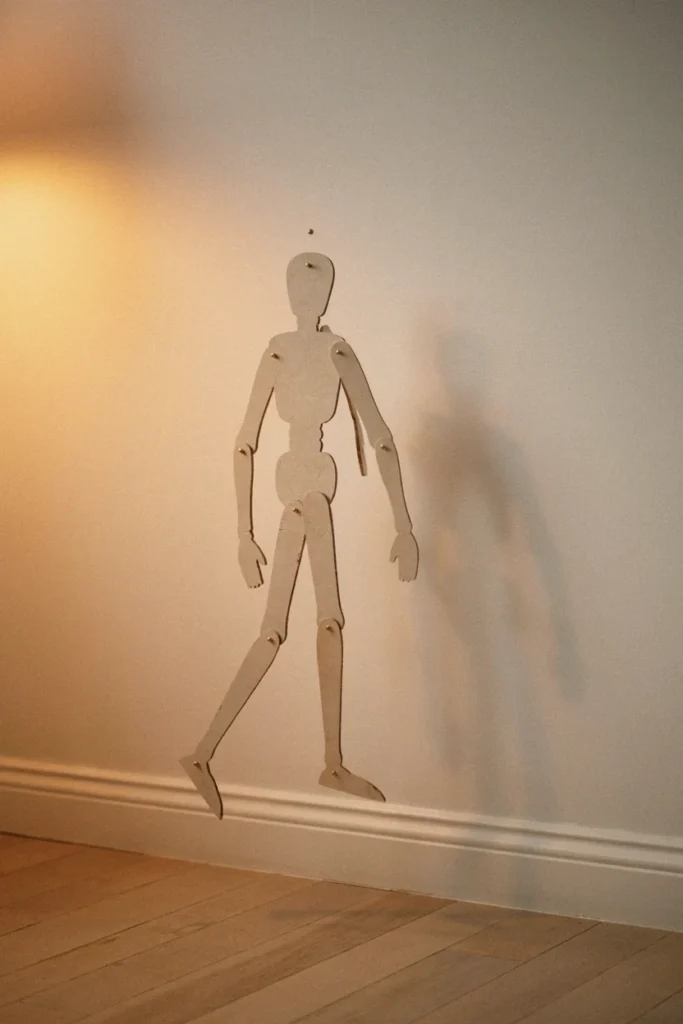
A jointed paper skeleton hangs one 36-inch die-cut cardboard skeleton with brass-brad joints from a single pin, so it dangles in a relaxed pose against a cream wall. Choose a reproduction skeleton of heavy chipboard, about 36 inches tall, with brass brad fasteners at the shoulders, elbows, hips, and knees, weighing about 4 ounces. The die-cut style is a vintage staple, and the flat black-and-bone graphics suit a cream or pale tobacco wall.
Hang it from one 1-inch brass pin through the skull, with the top at 76 inches from the finished floor, so the figure’s center lands at 58 inches. Bend one elbow and one knee before hanging, to give the figure a mid-step pose, and secure each hand with a 1/2-inch removable foam dot so it does not swing. Keep the figure at least 18 inches from any air vent, which would make the joints rattle and the paper curl.
Light it with a floor lamp fitted with a 2400K bulb, set 24 inches from the wall and 30 inches to one side. The low side light throws a long, doubled shadow of the skeleton across the cream wall, which gives the flat cutout a lively, slightly eerie second figure.
3. The Crepe Paper Streamer Swag in Orange and Black
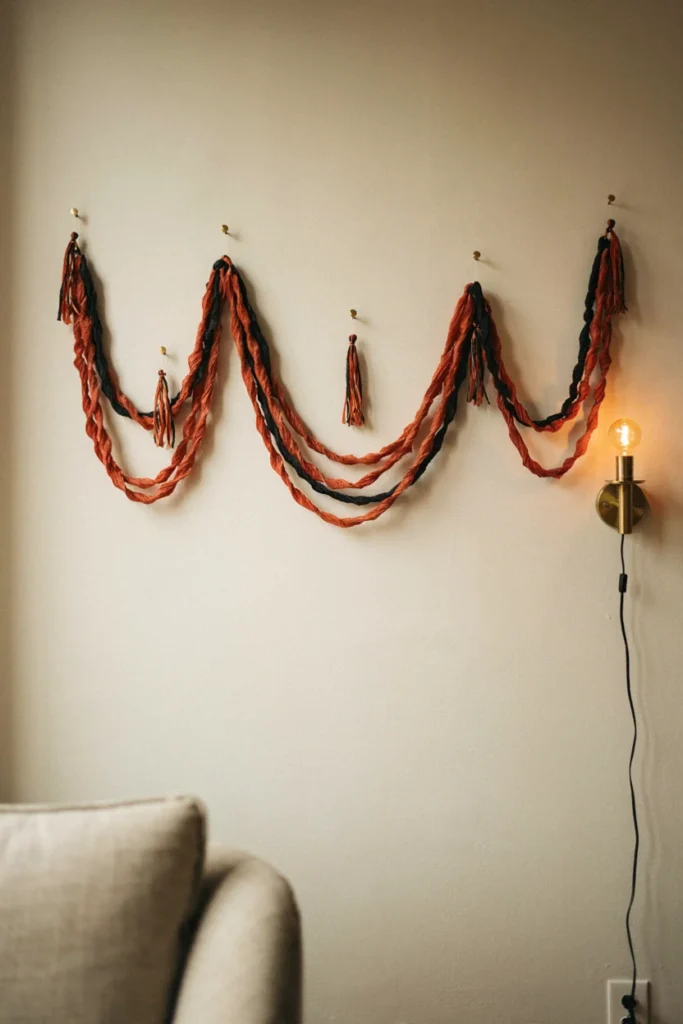
A crepe paper swag twists two colors of crepe paper streamers into a single rope and drapes it in scalloped curves across a wall, a decoration straight from a mid-century Halloween party. Use two rolls of crepe paper streamer, 1.75 inches wide by 81 feet long, one in burnt orange and one in black, and cut 18 feet of each. Twist the two strips together tightly, a full turn every 2 inches, so the colors spiral.
Install five 1-inch brass tacks or small nails 24 inches apart across a 96-inch wall at 68 inches from the finished floor, and swag the rope between them so each of the four scallops drops about 9 inches, with the lowest points landing at 59 inches. Finish each nail with a 4-inch fringe tassel cut from the same crepe paper. The swag weighs about 3 ounces. Keep it at least 36 inches from any heater, candle, or fireplace, since crepe paper ignites easily, and out of damp rooms, where the dye can bleed.
Light it with a plug-in brass sconce fitted with a 2200K filament bulb, mounted 14 inches beyond one end at 62 inches from the floor. The warm light brings out the paper’s crinkled texture and the spiral of orange and black, and the scallops cast a gentle wavy shadow on the wall.
4. The Oval Frame Cluster of Sepia Costume Photographs
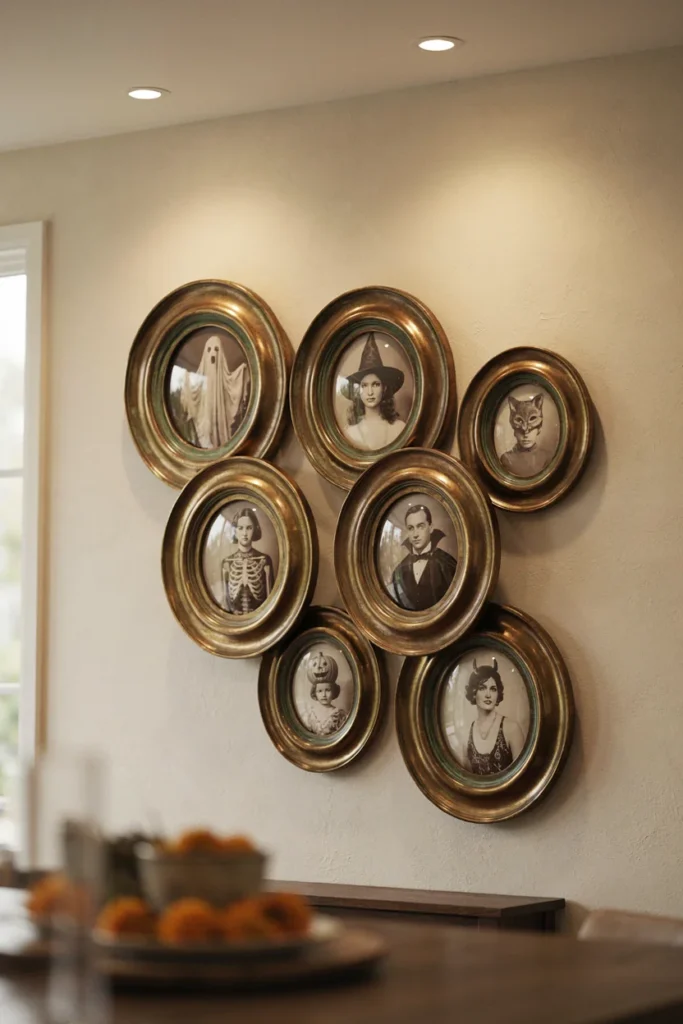
An oval frame cluster hangs seven oval frames holding sepia costume photographs in a loose, salon-style group, giving a wall the look of an old family album. Use frames in three sizes, three 5 by 7, three 8 by 10, and one 11 by 14 inch, in aged brass or antique gold, each with a curved glass front. Print the photographs in sepia on 250gsm matte paper, from public-domain archive scans of vintage costume portraits or from your own family Halloween photos converted to sepia.
Arrange the frames as an organic cluster, with the 11 by 14 inch oval slightly left of center and the others spreading outward at 2-inch gaps, so the group spans 36 inches wide by 30 inches high, centered at 58 inches from the finished floor. Each frame weighs 1 to 3 pounds, so hang each on a 1.25-inch picture nail at a 45-degree angle, and use paper templates taped to the wall to test the layout first. Keep to a single frame finish for a cohesive, collected look.
Light the cluster with two ceiling-recessed adjustable downlights at 2700K, set 30 inches from the wall and angled at 30 degrees. The warm light matches the sepia tone and deepens the brass, and the curved glass catches a soft highlight rather than a hard reflection, which suits the old-photograph character.
5. The Embossed Reproduction Tin Sign on a Cream Wall
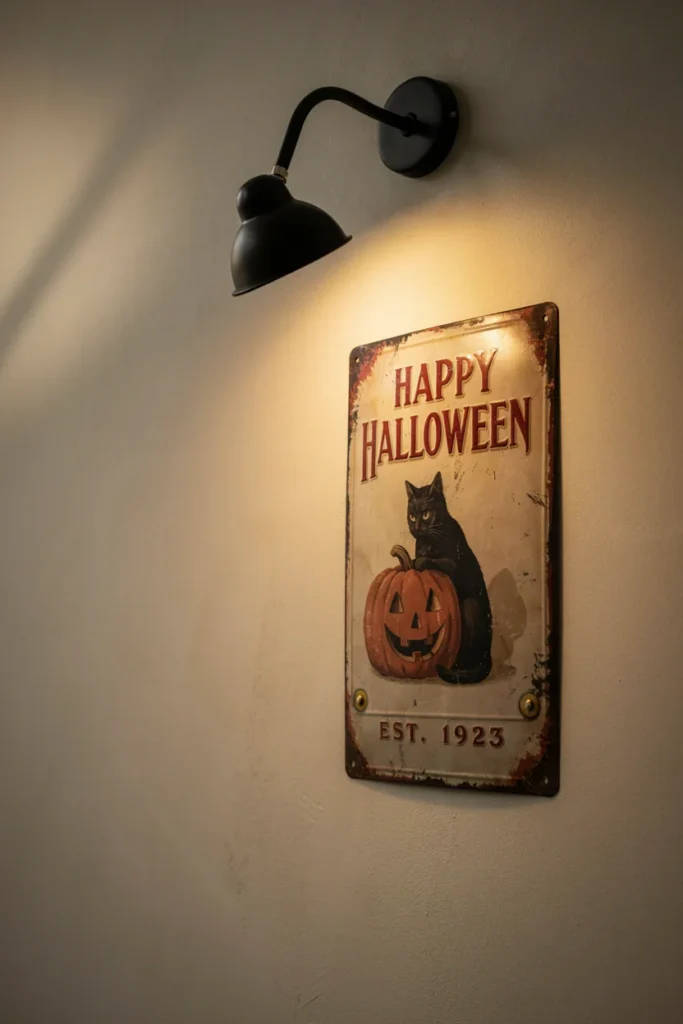
An embossed tin sign mounts one reproduction tin sign, 12 by 18 inches, with a vintage-style black cat and pumpkin illustration, rust-aged edges, and embossed lettering, on a cream wall as a single nostalgic focal piece. Choose a sign in 0.3mm steel with raised embossing and pre-punched corner holes, weighing about 1 pound, printed in a muted orange, black, and cream palette. Paint the wall behind in a warm cream or pale tobacco tone so the sign’s edges read cleanly.
Mount the sign with four 1/2-inch brass screws in plastic anchors, with its center at 58 inches from the finished floor, and keep at least 18 inches of clear wall on each side. Tin signs suit a casual, farmhouse-style room, like those in these farmhouse entryway wall ideas, and they hold up best in dry spaces, so avoid bathrooms and covered porches, where moisture can rust the edges beyond the intended patina. Wipe it with a dry cloth only.
Light the sign with a black gooseneck barn light fitted with a 2700K, 6-watt bulb, mounted 14 inches above it and aimed down at 30 degrees. The warm beam raises the embossing into relief, so the lettering and the cat’s outline cast tiny shadows that make the flat metal feel dimensional.
6. The Vintage Wallpaper Border Frieze with Cats and Pumpkins
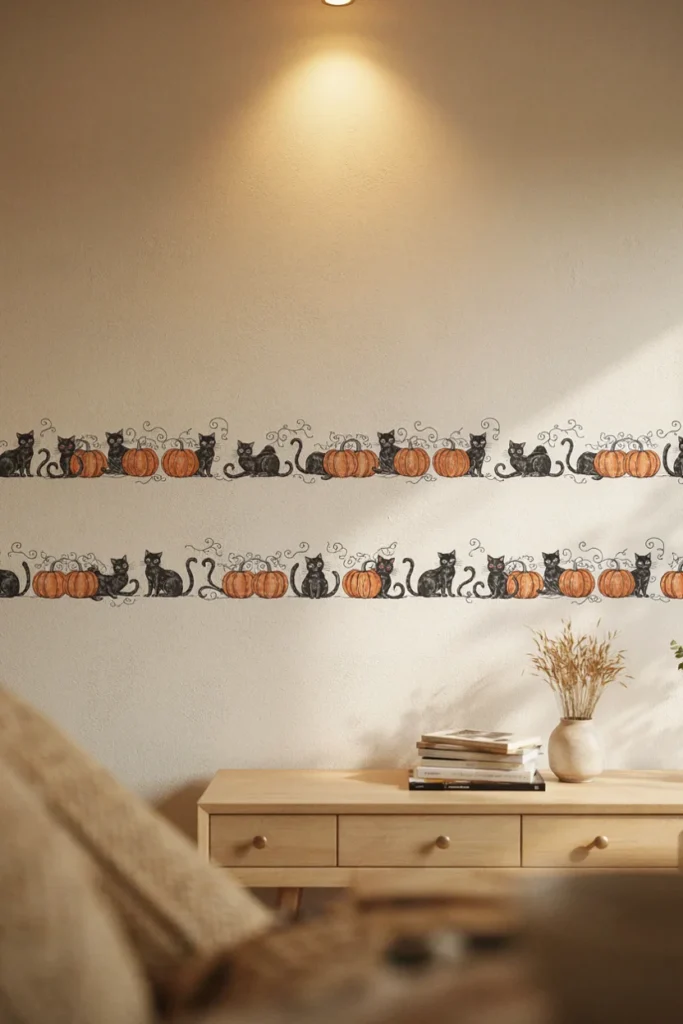
A vintage wallpaper border frieze applies a 4-inch band of peel-and-stick wallpaper border, printed with alternating black cats and pumpkins on cream, in a single straight line around the wall at eye level. Choose a border 4 inches tall with an 8-inch pattern repeat, in black, burnt orange, and cream, supplied in 15-foot rolls. The band reads as a nostalgic 1950s party-room detail, and it adds pattern without covering the whole wall.
Apply it to a smooth, painted wall cured for at least 4 weeks, with the band’s center at 58 inches from the finished floor, so it spans 56 to 60 inches. Snap a level line with a laser level, peel the backing 12 inches at a time, press it with a soft squeegee from the center outward, and cut each seam through the gap between motifs so the pattern joins invisibly. A 12-foot wall needs about 12 feet of border, so one 15-foot roll covers it with 3 feet to spare. Warm the border with a hair dryer to remove it in November.
Light the band with a ceiling-recessed wall washer at 2700K, set 24 inches from the wall. The even warm wash keeps the black cats and orange pumpkins at a consistent value along the whole length, and the cream ground glows softly, which gives the thin band the presence of a printed paper trim.
7. The Paper-Pulp Mask Board on Black Velvet
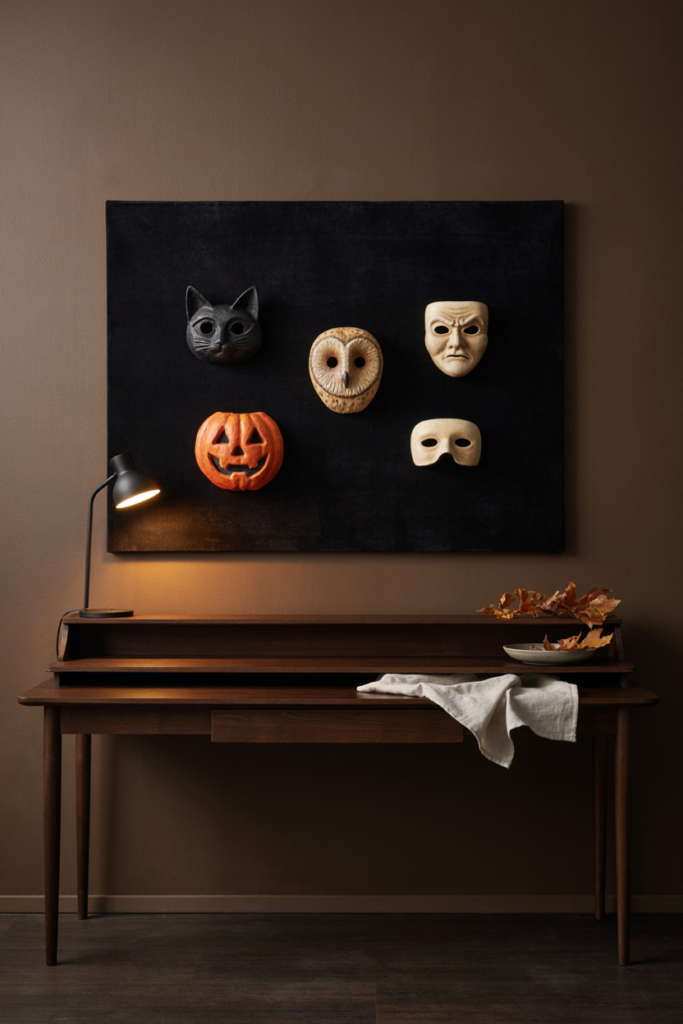
A paper-pulp mask board mounts five reproduction paper-pulp masks, a cat, an owl, a witch, a pumpkin, and a plain domino, on a black velvet board for a collector-style display of vintage Halloween character. Choose masks 7 to 9 inches tall, in molded paper pulp with painted faces in muted orange, black, and cream, each weighing about 3 ounces. Wrap a 24 by 36 inch panel of 1/4-inch plywood with black cotton velvet, stapling at the back, so the board weighs about 4 pounds.
Arrange the masks in two staggered rows, three over two, with 3-inch gaps, and attach each with a loop of black thread through its eyelets to a 3/4-inch brass pin pushed into a 1/2-inch foam core layer under the velvet. Hang the board on a 3/4-inch French cleat into studs with two 2-inch screws, centered at 58 inches from the finished floor. Over a 48-inch console, the 24-inch width equals 50 percent of the furniture, which suits a compact, curated display.
Light it with a black gooseneck clamp light fitted with a 2700K bulb, clamped to a nearby shelf and aimed at the board from 24 inches away. The warm pool of light brings out the painted faces against the black velvet, and the velvet absorbs the rest of the light, which gives the masks the look of objects in a museum case.
8. The Mid-Century Starburst in Black and Burnt Orange
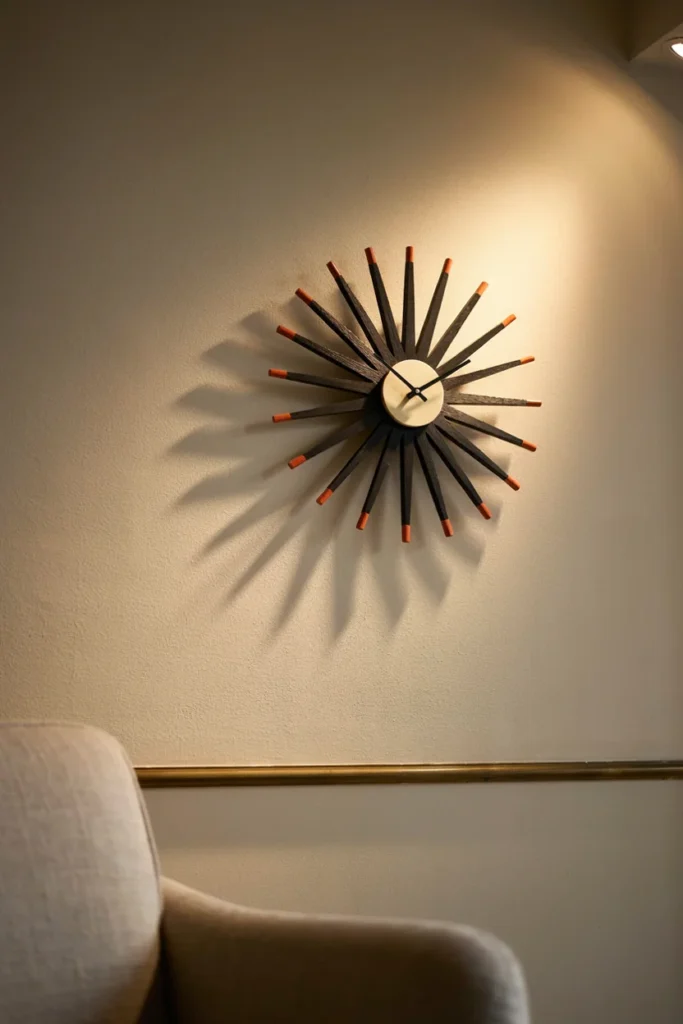
A mid-century starburst mounts a 30-inch sunburst of 24 black wooden rods with burnt-orange tips around a cream center disc, an atomic-age shape reinterpreted as a harvest moon. Cut 24 birch dowels, 1/4 inch in diameter, in alternating lengths of 11 and 13 inches, and paint each in matte black with the outer 3 inches in burnt orange. Glue them into drilled holes around a 4-inch cream-painted birch disc, 1/2 inch thick, spaced every 15 degrees.
Mount the starburst on a hidden screw through the center disc into a stud or a 25-pound anchor, with the center at 58 inches from the finished floor. The piece weighs about 3 pounds and spans 30 inches, and it works best on a wall at least 48 inches wide, with 9 inches of clear space around each rod tip. Check each rod’s glue joint before hanging, and avoid bumping it, since the dowels are fine and can snap.
Light it with a ceiling-mounted adjustable spotlight at 2700K, set 30 inches from the wall and angled at 30 degrees from the right. The beam throws a fan of fine rod shadows onto the cream wall, which doubles the starburst and gives the flat piece a depth that echoes mid-century lighting.
9. The Hooked Wool Cat Hanging in Burnt Orange
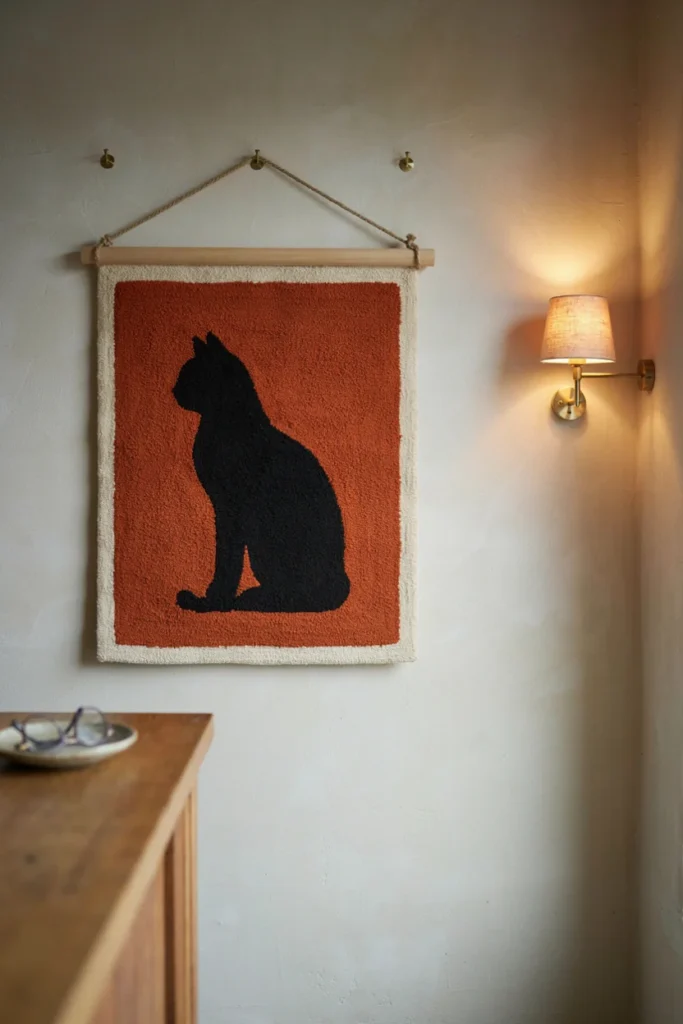
A hooked wool hanging mounts one hand-hooked wool wall hanging, 20 by 24 inches, with a black cat on a burnt-orange ground and a cream border, as a folk-art centerpiece. Many rug-hooking kits come at this size, with wool strips 1/4 inch wide pulled through a linen or burlap backing, and the work takes 20 to 30 hours for a beginner. Choose a simple silhouette so the cat reads from across the room, and bind the edges with cotton twill tape.
Sew a 2-inch-wide cotton tape sleeve to the top back and hang the piece from a 24-inch wooden dowel on two 1.5-inch brass hooks, or mount it on a 3/4-inch French cleat, with the center at 58 inches from the finished floor. The piece weighs about 3 pounds. Keep it away from direct sun, which fades wool dyes, and vacuum it gently on a low setting through a stocking to avoid snagging.
Light it with a plug-in sconce fitted with a 2400K, 4-watt bulb, mounted 12 inches to one side at 62 inches from the floor. The warm side light picks out the nap of each hooked loop and gives the black cat a soft, velvety depth against the orange.
Across these nine designs, the nostalgia comes from contrast between a quiet cream ground and one aged, tactile element: tea-stained card against walnut, black chipboard against cream plaster, crepe paper against pale paint, and hooked wool against warm light. Each wall holds to a single dominant idea, a focal point near 58 inches from the finished floor, and a warm 2200K to 2700K light source, so the wall feels collected rather than staged. Choose one or two, keep the palette to cream, tobacco, burnt orange, and black, and for a broader range of styles explore these Halloween wall design inspirations, or for a darker, more atmospheric take, these moody Halloween wall styling ideas.
Frequently Asked Questions About Vintage Halloween Wall Décor Inspirations
What colors define vintage Halloween decor?
Cream, burnt orange, black, and tobacco brown define it, often with a touch of muted green or gold. The tones are slightly faded, with an aged paper warmth, rather than the bright neon orange and purple of modern party goods. Lighting at 2200K to 2700K reinforces the amber, nostalgic cast.
How do I make new paper decor look vintage?
Print on matte cotton or uncoated paper, never gloss, and tea-stain it with a bath of black tea bags for 20 minutes, then air dry. Convert photographs to sepia, add brass brads or pins instead of plastic fasteners, and choose cream or tobacco mats instead of bright white for a softer, aged effect.
What mistakes should I avoid with vintage Halloween wall decor?
Avoid glossy plastic reproductions, bright cool bulbs above 3000K, and mixing too many eras or colors on one wall. Keep crepe paper and card at least 36 inches from heat or flame, space framed pieces evenly, and edit each wall to one or two collections so the display looks collected, not cluttered.
Where can I find vintage Halloween images to print?
Public-domain archives such as the Library of Congress, the New York Public Library Digital Collections, and Wikimedia Commons hold early 1900s postcards and photographs. Check each item’s rights statement before printing, since not every scan is free to reuse, and choose files of at least 300 dpi for sharp results.
How do I store and reuse vintage Halloween wall decor after the season?
Store paper pieces flat in acid-free boxes with tissue, away from damp, and keep crepe paper for one season, since it flattens. Frames, the tin sign, the starburst, and the hooked wool hanging can stay up or be stored year-round, and sepia photographs work as general decor after October.