6 Last-Minute Halloween Wall Décor Ideas Using Items You Already Own
Last-minute Halloween wall décor ideas using items you already own succeed when the constraint is treated as a design brief. A blank wall, a hammer, a roll of painter’s tape, and the contents of one closet are enough to build a composition with real structural weight. Each idea below targets a zone 36 to 60 inches wide, anchored by one dominant mass and a focal point at 57 to 60 inches from the finished floor, so the result reads as a deliberate installation rather than a scattering of leftovers.
Material authenticity carries these builds. Wood and metal picture frames, tea-stained printer paper, a wool buffalo-check throw, jute twine, white ceramic or paper plates, and foraged bare branches all bring genuine texture, grain, and weight that a packaged decoration kit rarely matches. Limiting each wall to two or three tones, such as charcoal, rust, and bone white, keeps mismatched household objects visually unified and lets the textures do the work.
Time and lighting complete the brief. Every idea takes under 90 minutes, uses lamps and string lights already in the house at 2200K to 2700K, and relies on hardware rated for the actual weight of each piece, with removable fixings wherever a rental lease demands them. Warm amber light turns tea-stained paper, wool nap, and bare wood into rich, shadowed surfaces, which is why these ideas look composed by a designer even when assembled on the afternoon of October 30.
1. The Silhouette Frame Gallery Built from Existing Picture Frames
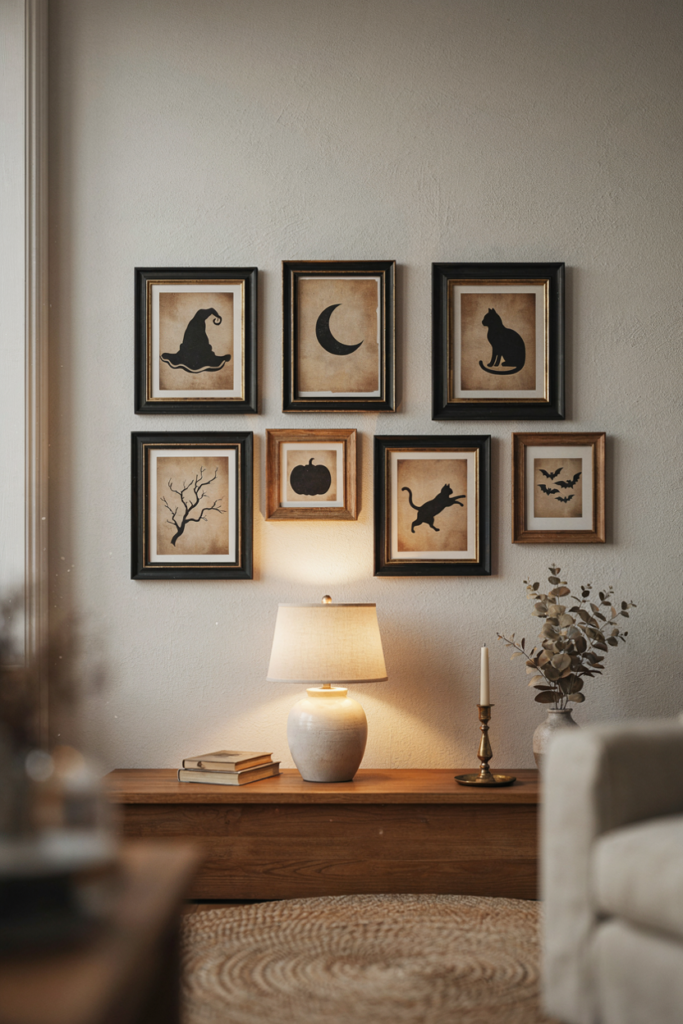
A silhouette frame gallery repurposes five to seven picture frames you already own by replacing the artwork with hand-cut black cardstock shapes mounted on tea-stained paper. Brew two black tea bags in one cup of hot water, brush the tea across sheets of 24 lb printer paper, and dry them flat for 30 minutes, or for 10 minutes on a baking sheet in a 200°F oven, until the paper turns a soft parchment tan with uneven edges. Cut silhouettes from black cardstock: a witch hat, a crescent moon, a cat on a fence line, a bare branch, and a pumpkin outline, each sized to leave a 1.5-inch margin inside the frame opening.
Keep the gallery cohesive by grouping frames by finish: three black and two warm wood is a stable ratio, in sizes such as 5 by 7, 8 by 10, and 11 by 14 inches. Lay the layout on kraft paper on the floor first, hold gaps at 2 inches, and trace each frame to make paper templates. Hang the group so its center point sits at 57 to 60 inches from the finished floor, with an overall width of 36 to 48 inches above a console or dresser. Frames under 3 pounds hang securely from a 1.25-inch picture nail driven at a 45-degree downward angle, with no studs required.
Light the gallery with a table lamp fitted with a 2700K, 60-watt-equivalent LED bulb, set on the console 24 inches from the wall, so the tea-stained paper glows amber and each silhouette holds a crisp, dark edge.
2. The Dinner Plate Moon with a Foraged Branch Cluster
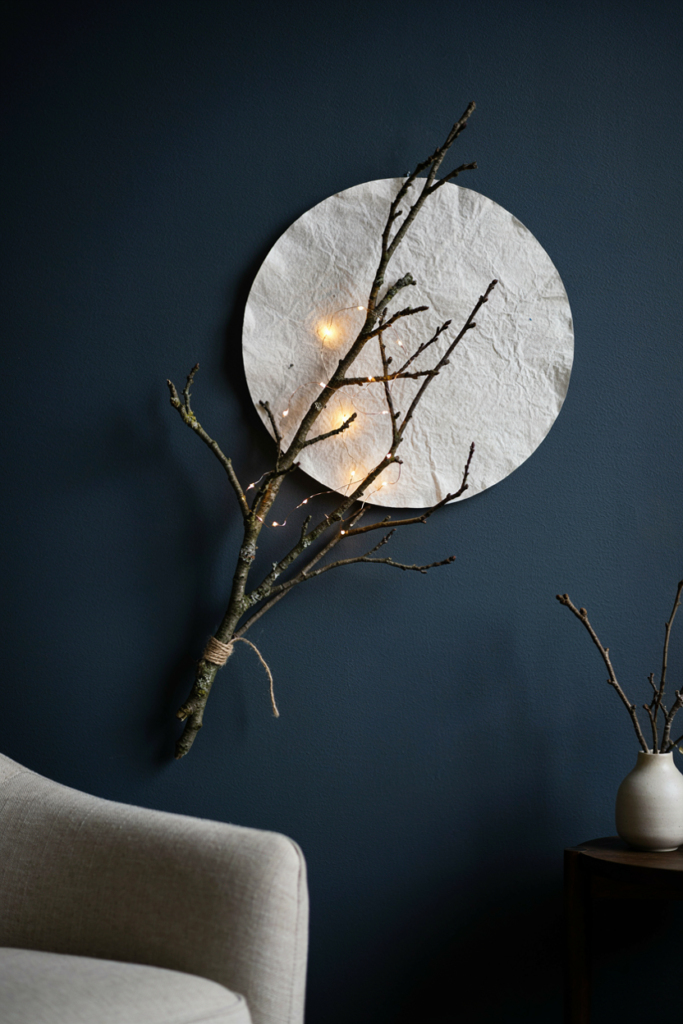
A plate moon composition mounts one pale round disc as a full moon behind a bundle of bare foraged branches, creating a nocturnal landscape on a blank wall. Use a 10-inch white paper plate or a 10-inch circle cut from a white cotton sheet, which weighs almost nothing and avoids the risk of hanging ceramic. Texture the surface by dabbing a cotton ball dipped in cooled, diluted coffee in overlapping rings to form soft craters, then let it dry for 20 minutes. Secure the moon to the wall with four loops of painter’s tape, each rolled to a 1-inch diameter, so the paint underneath stays intact.
Gather five to seven dry bare branches from a yard or park, 24 to 40 inches long, in mixed thicknesses from pencil to thumb width. Bind them at the base with jute twine and anchor the bundle with three small nails, setting the mass to cross the lower left of the moon so the silhouette overlaps roughly one third of the disc. Center the moon at 60 inches from the finished floor, with the whole composition spanning 36 to 40 inches wide.
Weave a 20-bulb warm white string light, around 2200K, through the branches, and hide the battery pack behind the thickest limb. The low amber glow reads as moonlight filtered through winter trees against a deep navy or gray wall.
3. The Wool Throw Tapestry Hung from a Rod Above the Sofa
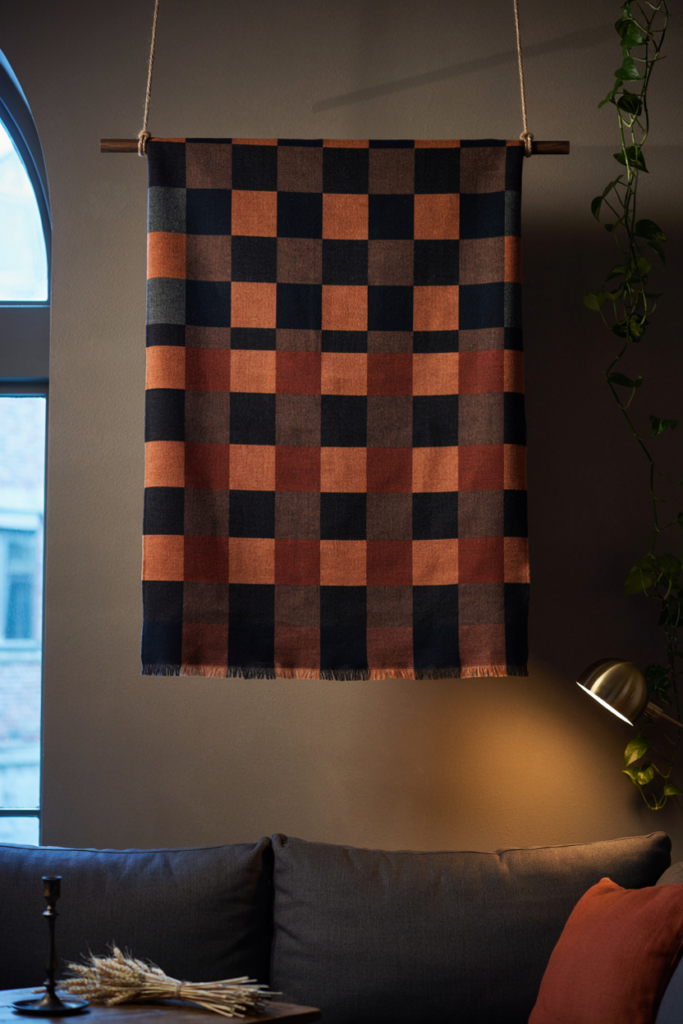
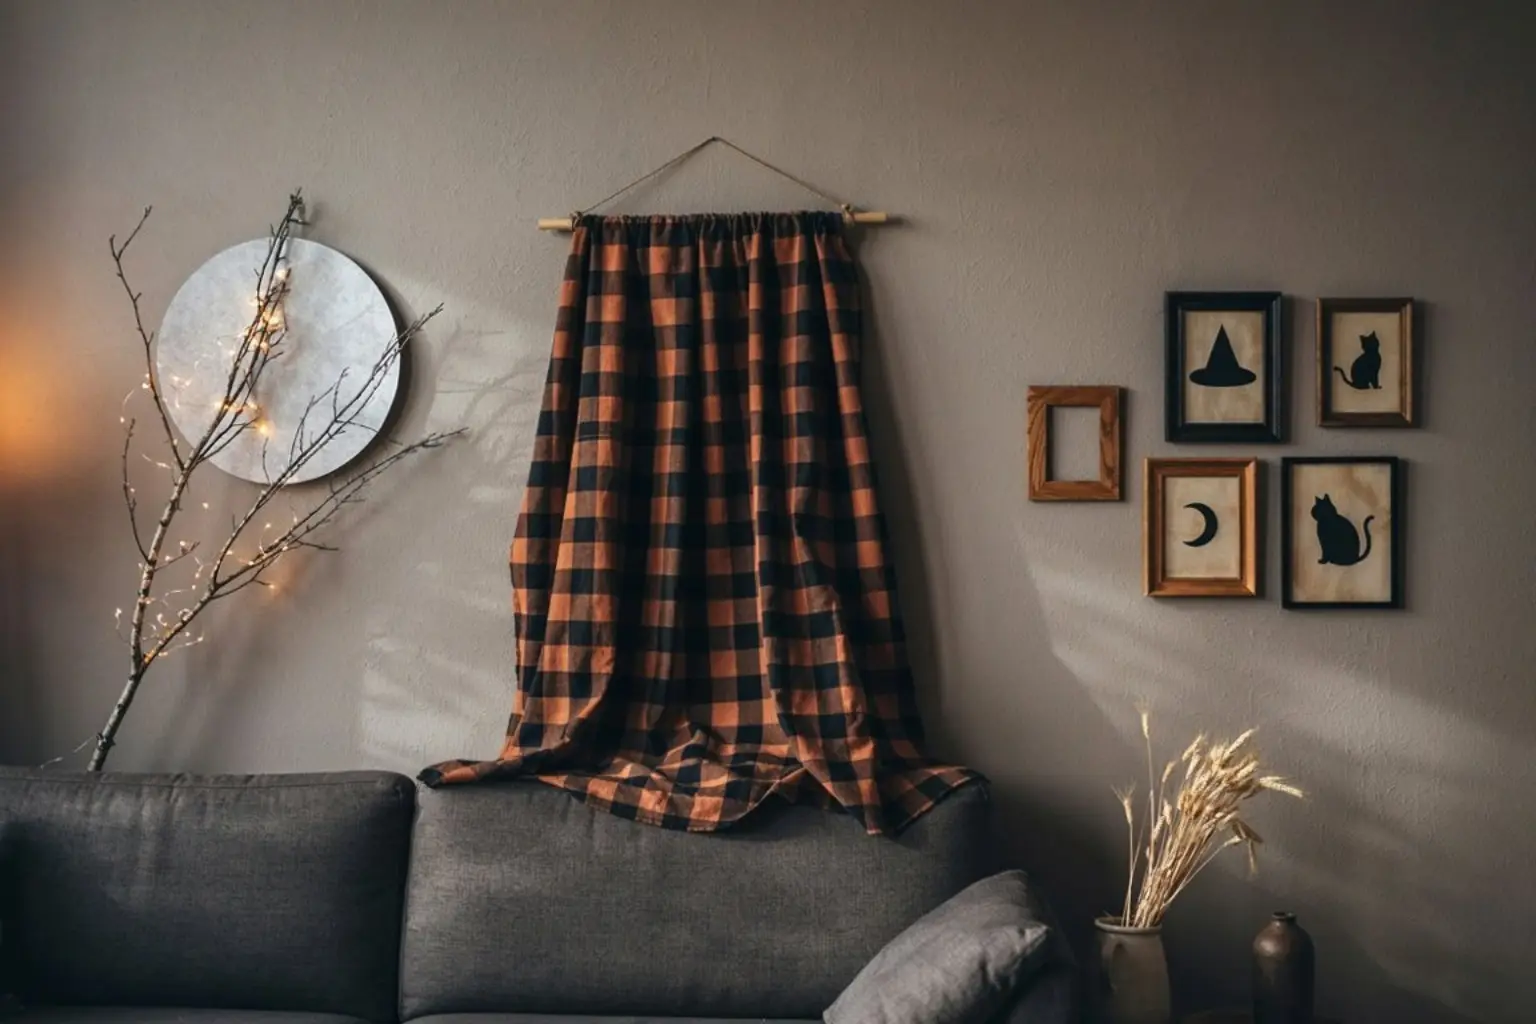
A throw blanket tapestry hangs a wool plaid throw from a rod to turn a blank wall into a textile feature, giving the room a rust and charcoal harvest-gothic palette in minutes. Choose a 50 by 60 inch throw in charcoal and rust buffalo check, then fold it in half along the width so the drop measures 30 inches and the blanket forms a clean 50 by 30 inch panel. Thread a 54-inch curtain rod, spare dowel, or broom handle through the top fold, or secure the fold with six safety pins hidden behind the fabric at 8-inch intervals.
Suspend the rod from two lengths of jute twine or leather lacing, each 16 inches long, tied to two 2.5-inch screws rated for 25 pounds in drywall anchors, since a wool throw weighs 2 to 3 pounds. Over a 72-inch sofa, the 50-inch width equals about 69 percent of the sofa, inside the 60 to 75 percent range that reads as proportional. Set the rod at 70 inches from the finished floor, which leaves the lower edge of the blanket at 40 inches, about 7 inches above a 33-inch sofa back.
Brush any lint from the wool with a damp rubber glove so the weave stays crisp. Light the panel with a floor lamp fitted with a 2700K bulb, positioned 36 inches from the wall and angled at 30 degrees, so the wool nap catches the light and each plaid line reads in rich contrast.
4. The Cast Iron and Copper Pot Rail with Hanging Herb Bundles
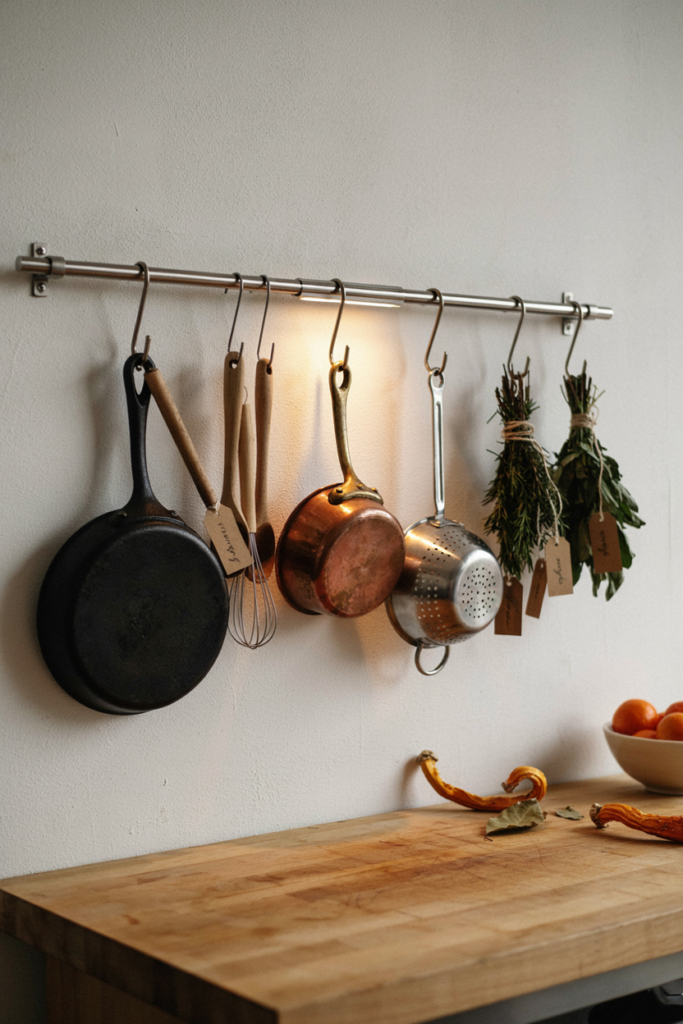
A pot rail witch’s kitchen wall hangs cookware and dried herbs from a single horizontal rail, turning a bare kitchen wall into a working apothecary display. Use a 36-inch stainless steel towel bar or an existing pot rail, fixed into two studs with 2.5-inch screws at 64 inches from the finished floor. Fixed into studs, a rail of this type comfortably holds 20 pounds, which covers one 10-inch cast iron skillet at about 5 pounds, a 3-quart copper or stainless saucepan at about 2.5 pounds, two wooden spoons, and a metal colander. Hang each piece from a 2.5-inch S-hook, spaced 5 to 6 inches apart across the rail.
The setup suits a kitchen wall that already leans toward natural materials, like the ones in these boho kitchen wall décor ideas, because the iron, copper, and wood already share a matte, aged tone. Add three bundles of rosemary and sage, each about 8 inches long, tied with jute and hung upside down between the pans, plus two 2 by 4 inch kraft tags handwritten in black ink with labels such as “Wolfsbane” and “Mugwort.” The tags are the only theatrical gesture, so the display still reads as a real kitchen.
Hold the lowest pan at 47 inches from the finished floor, which leaves 11 inches of clearance above a 36-inch counter, and keep the full arrangement within 36 inches of width. Use an existing under-cabinet LED at 2700K, or clip a 5-watt, 2700K spotlight to the cabinet underside at a 25-degree angle, so the copper warms to a deep amber and the cast iron keeps a matte black sheen.
5. The Black Yarn Spiderweb Strung on Brad Nails
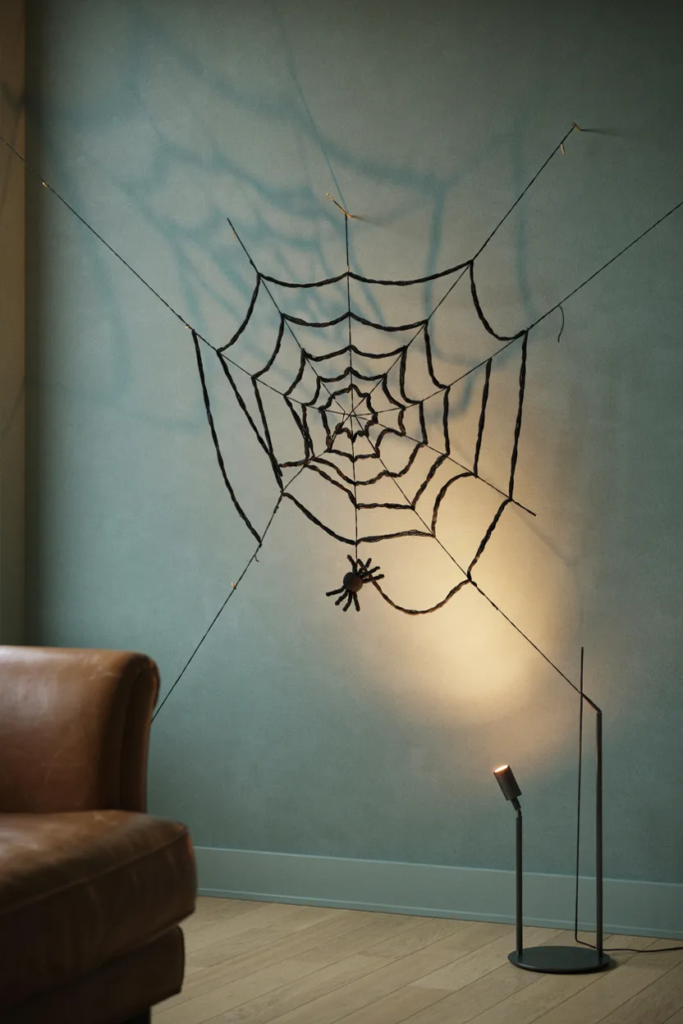
A yarn spiderweb wraps black cotton yarn around a radial layout of small brad nails to produce a graphic web 36 inches across on any flat wall. Mark the center point at 60 inches from the finished floor, then use a paper circle folded into eighths and a pencil to mark eight outer points at an 18-inch radius, spaced every 45 degrees. Tap a 1-inch brad nail into the center and each outer point, driven in about half an inch at a slight upward angle so the yarn cannot slip.
Run black worsted cotton yarn from the center to each outer nail to form eight spokes, then wrap it around each outer nail twice and knot it. Build the concentric rings next: working at radii of 6, 12, and 18 inches, loop the yarn from spoke to spoke and tie a half hitch where it crosses each spoke, pulling each ring slightly taut so the lines curve inward between spokes the way a real orb web sags. The whole web uses roughly 25 yards of yarn and takes about 45 minutes. Fill the nail holes with a dab of spackle after the holiday.
Hang the web on a light wall in bone or soft sage so the black yarn reads clearly, and drop a 2-inch black felt spider from a 12-inch strand of yarn tied at the hub. Place a floor uplight fitted with a 2700K bulb 18 inches from the wall; its low angle casts a second, softer web of shadows across the paint, which doubles the visual depth.
6. The Pantry Apothecary Jar Shelf with Tea-Stained Labels
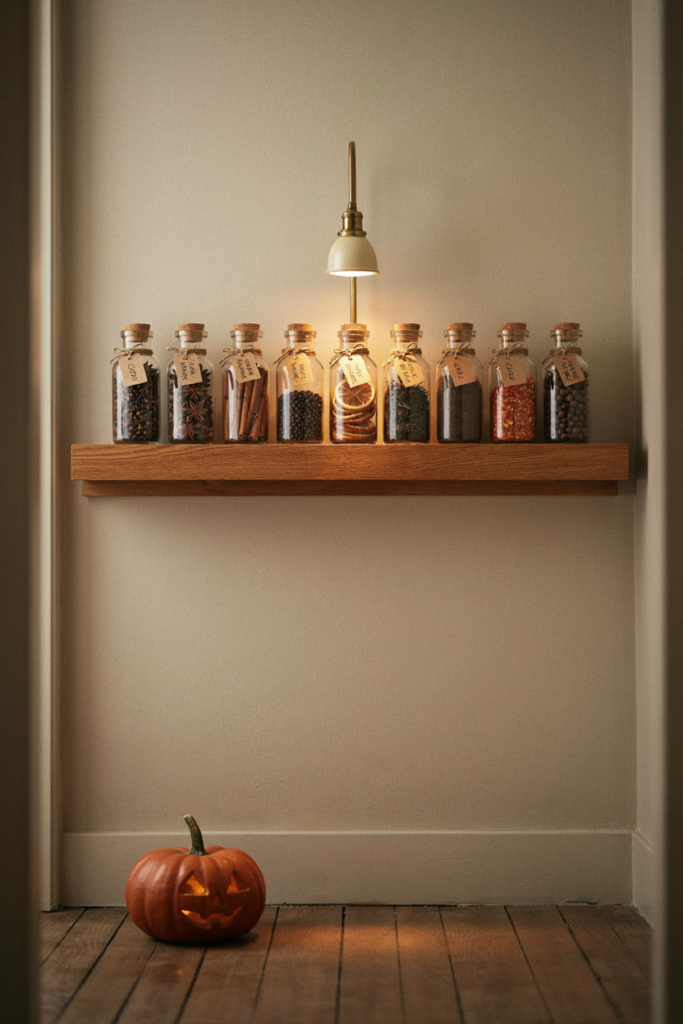
A pantry apothecary shelf turns a single floating shelf you already own into a row of labeled glass jars filled with spices, tea, and dried citrus, styled like a witch’s potion cabinet. Gather six to eight clear jars: two 32-ounce tall jars at about 7 inches high, three 16-ounce mason jars at 5 inches, and three 8-ounce jelly jars at 3.5 inches. Fill them with whole cloves, star anise, cinnamon sticks, black peppercorns, dried orange slices, and loose black tea, so the “potions” are real pantry items and the colors stay in a natural range of amber, brown, and rust.
Hand-letter playful labels on 2 by 4 inch craft tags, stained with the same brewed tea used in the first idea, using names such as “Raven’s Pepper,” “Cauldron Cinnamon,” and “Bat’s Wing Tea,” and tie them to each jar neck with twine. Fixed into studs, a 30-inch shelf that is 8 inches deep holds 25 pounds, while the filled jars total about 7 pounds. Mount the shelf at 54 inches from the finished floor, so the tallest jar tops out near 61 inches and the grouping centers at about 57 inches. Because the shelf projects only 8 inches, it also works in the layouts covered in these narrow entryway wall ideas, leaving about 28 inches of clear walking width in a 36-inch passage.
Light the shelf with a gooseneck desk lamp fitted with a 3000K bulb, placed 18 inches away and aimed at 30 degrees, so the glass catches soft highlights and the dried orange slices glow translucent.
Conclusion
Across these six builds, the strongest effect comes from material contrast: tea-stained parchment against black cardstock, soft wool against bare branch, cast iron against copper, and matte black yarn against pale plaster. Each idea anchors a single wall with one dominant mass, a focal point near 60 inches from the finished floor, and a warm 2200K to 3000K light source, so household objects read as architecture instead of clutter. For a bigger setup, the same hardware and lamps carry straight into these witch and pumpkin wall styling ideas for Halloween 2026, and once November arrives they transition easily into these modern Christmas wall décor ideas.
Frequently Asked Questions
What Halloween wall décor can I make with items I already own?
Picture frames, a wool throw, a white paper plate, yarn, pantry spices, and foraged branches cover most designs. Replace framed art with black cardstock silhouettes, hang a plaid throw from a rod, string a yarn spiderweb on brad nails, or fill kitchen jars with spices and tea-stained labels.
How long do last-minute Halloween wall décor projects take?
Most of these ideas take 15 to 90 minutes. The wool throw tapestry takes about 15 minutes, the yarn spiderweb about 45, the plate moon about an hour, and the frame gallery closer to 90 because the tea-stained paper needs drying time. You can finish one wall in an afternoon.
How do I hang Halloween decorations without damaging paint?
Use rolled painter’s tape loops for lightweight pieces such as a paper moon, and small 1-inch brad nails for anything over a pound. Brad holes are tiny and fill with a dab of spackle. Avoid standard masking tape, which can lift paint, especially on fresh or matte walls.
What light color is best for Halloween wall décor?
Warm white light between 2200K and 2700K suits Halloween best, because it enriches orange, rust, and tea-stained tones and softens black shapes. Use 3000K only for focused task lighting, such as a lamp aimed at a jar shelf. Bulbs above 4000K flatten textures and make decorations look cold.
How high should I hang Halloween wall décor?
Center the main composition at 57 to 60 inches from the finished floor, which matches average eye level. Over a sofa or console, leave 6 to 8 inches between the furniture and the lowest edge, and keep the arrangement between 60 and 75 percent of the furniture width for visual balance.